R&D Experiments
Comment Classification Using BERT Fine-Tuning

Last time, we built an ENG version of the Text Classifier with a micro dataset. For this, we were applying a user friendly framework Fast.ai. That method is based on Universal Language Model Fine-Tuning (ULMFiT).
This time, we have decided to experiment with BERT as long as its popularity as well as a variety of its usage are growing at a rapid speed. Also, we are going to use BERT layer in a model applying Keras.
BERT-Based Comment Classification: A New Approach for Multi-Language Text Analysis
So here is what we have:
- A micro dataset in DE language (text and labels)
- Tesnorflow 2.0
- Keras
Of course, it is better to work with a larger dataset. To be precise, at least 200 samples are already a good way to go. Let’s be realistic, though. Usually, businesses don’t have that necessary data but still want results. In this experiment, we are going to replicate this common business situation, using a very small dataset.
Our approach to this experiment was inspired by the article BERT+KERAS+TF2.0 - fine tuning SPANISH.
Using Google Colab and Google Drive
To start a fast prototyping, we use Google Colab , which, by the way, offers free GPUs within certain time limitations.
But most of the coding is done on a local PC. So we synchronize Google Drive with the local PC and then mount Drive on Colab notebook. Here is a vivid explanation on how to link Google Colab with your gDrive.
And in the next paragraphs, we are going to demonstrate you how to synchronize Google Drive with the local PC, step by step.
1. We create a separate Google account for development (in such a way, we avoid having some private staff mounted on Google Colab).
2. Then, we install Open Drive to sync the local development directory with gDrive (as an alternative, you can also clone or pull your code to Colab environment and run it from there). So every time we apply local code changes, it transfers to the cloud storage.
3. In Colab Notebook, the first thing we need to do is to mount Drive by using the following command:
from google.colab import drive
drive.mount('/content/drive', force_remount=True)
It will require you to enter your authorization code provided by the link.
Once it's done, you will see the following message:
‘Mounted at /content/drive’
To make sure that everything is OK, check content on the Drive:
!ls "/content/drive/My Drive/"
Use Tensorboard in the Notebook
Before installing all the required packages, you need to set up Tensorboard:
%load_ext tensorboard
Then, map to the directory where training logs will be stored:
%tensorboard --logdir 'logs/fit'
NOTE: we loaded our BERT MODEL directly to our working directory in GDrive. But in order to save Google Drive storage, you should better load and unzip model directly in the Colab environment and simply use this path in the training process.
Install Necessary Packages in Colab
For this part, we will use Tensorflow 2.0:
!pip install tensorflow==2.0.0
!pip install bert-for-tf2
!pip install sentencepiece
And that’s it. All the other necessary packages are installed by default in the Google Colab environment.
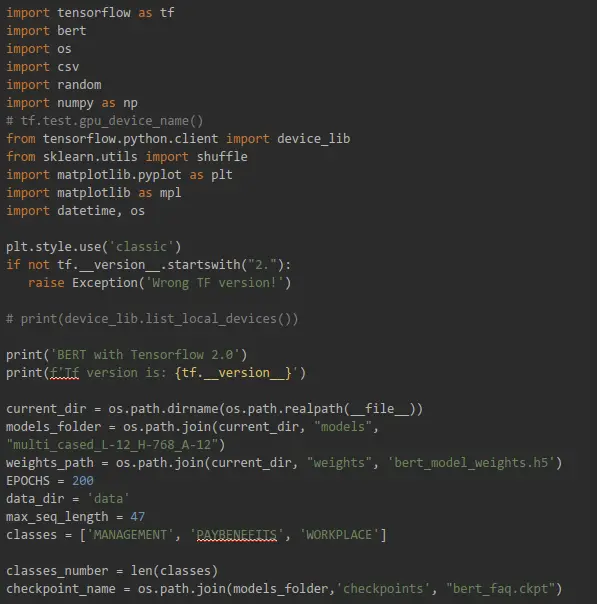
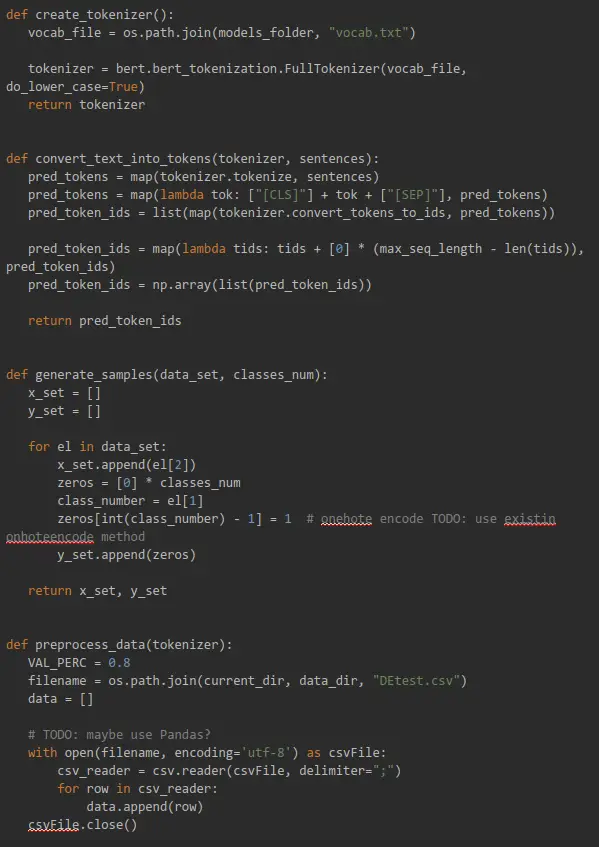
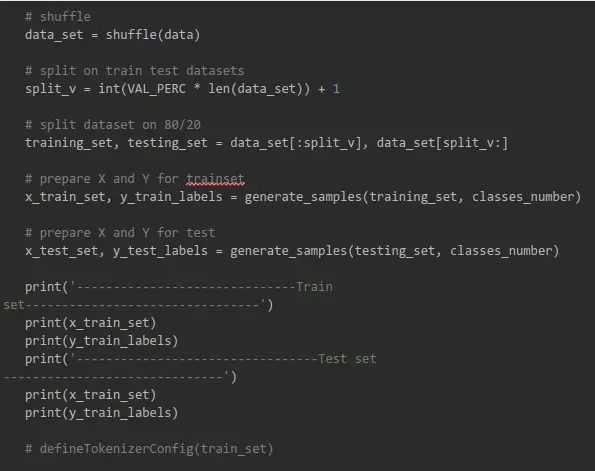
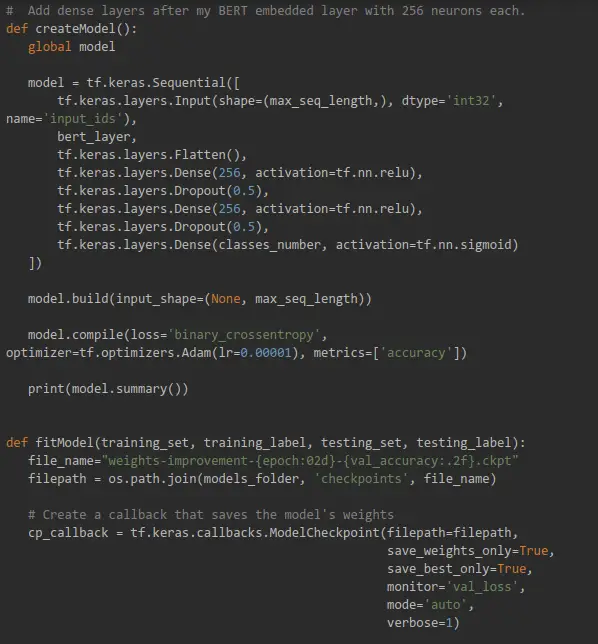
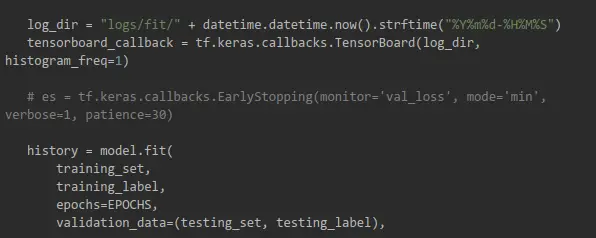
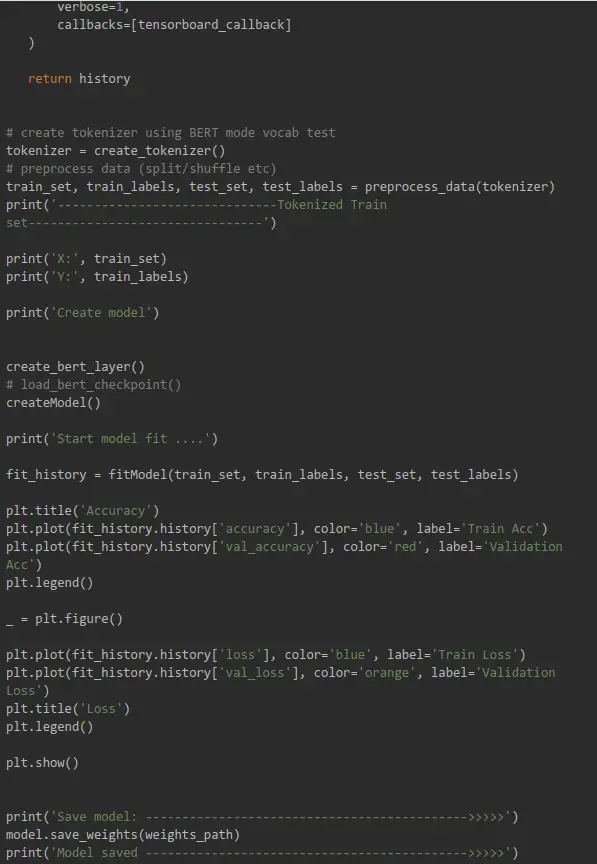
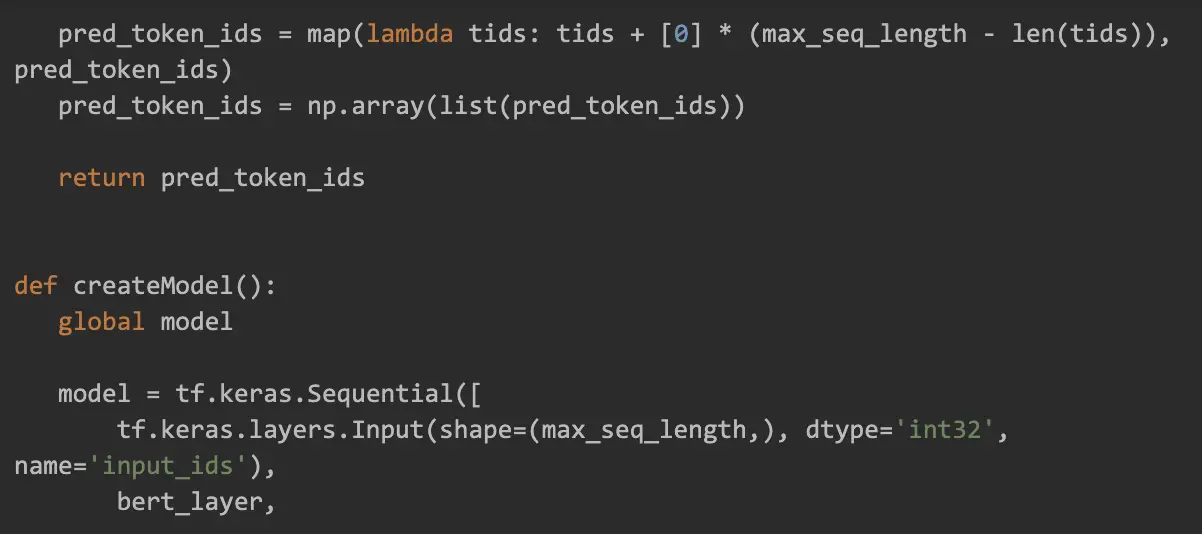
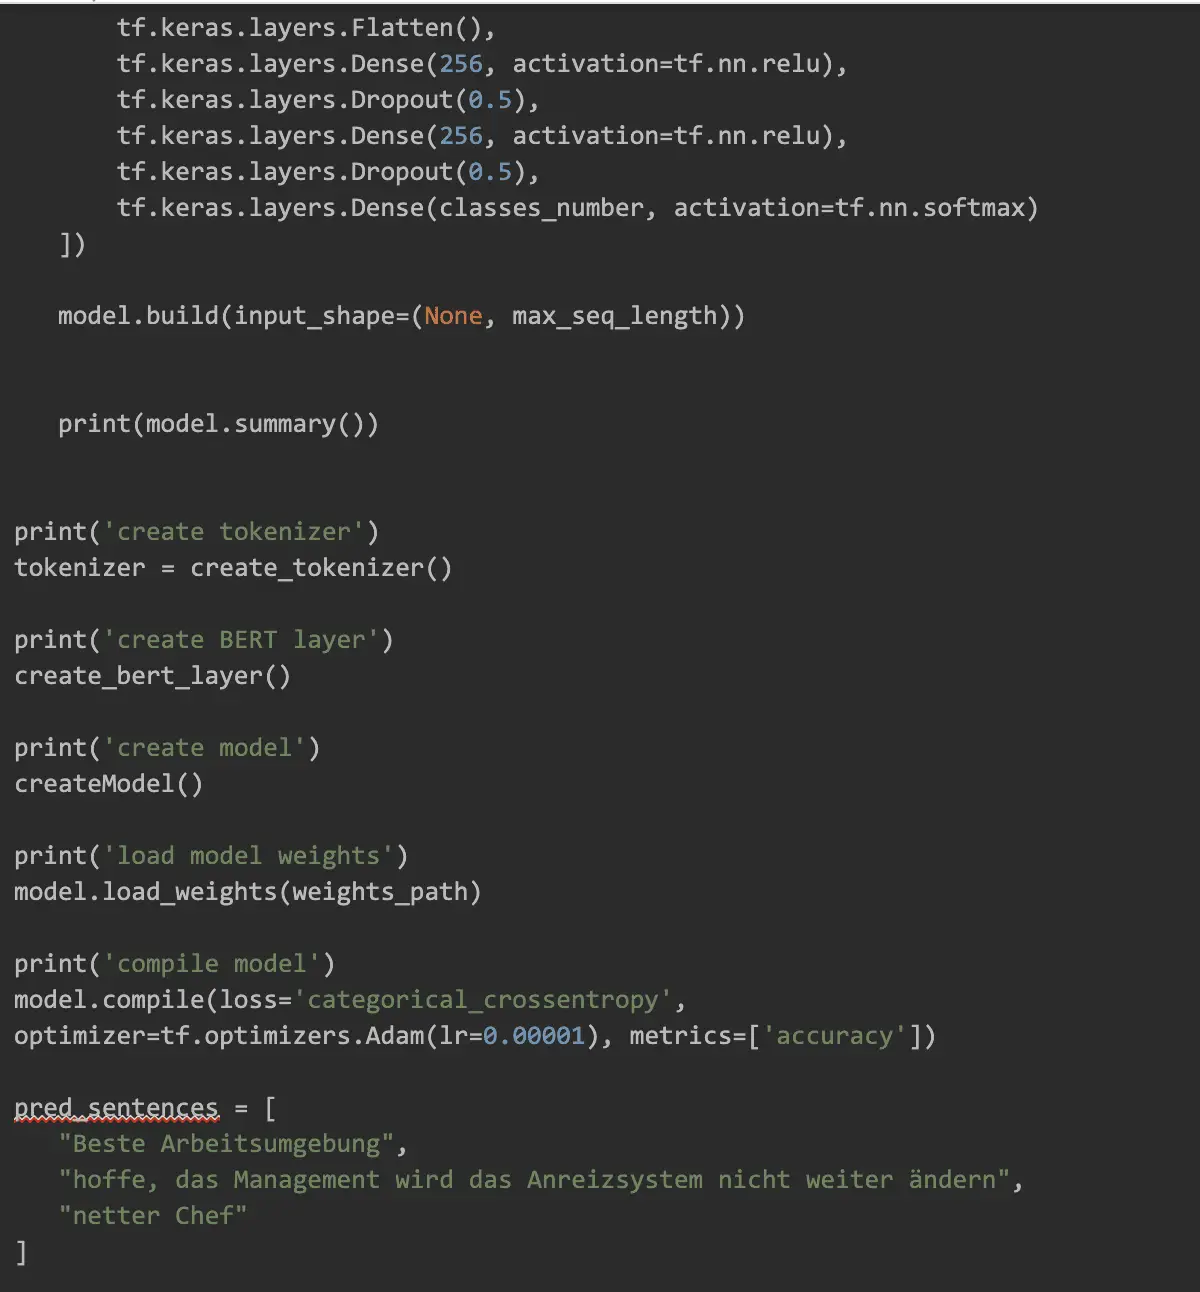
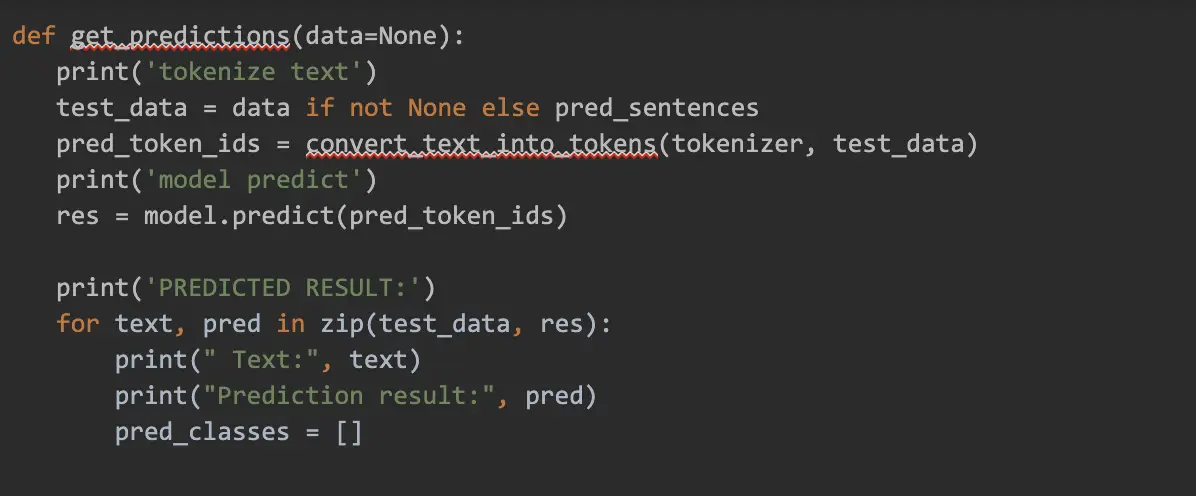
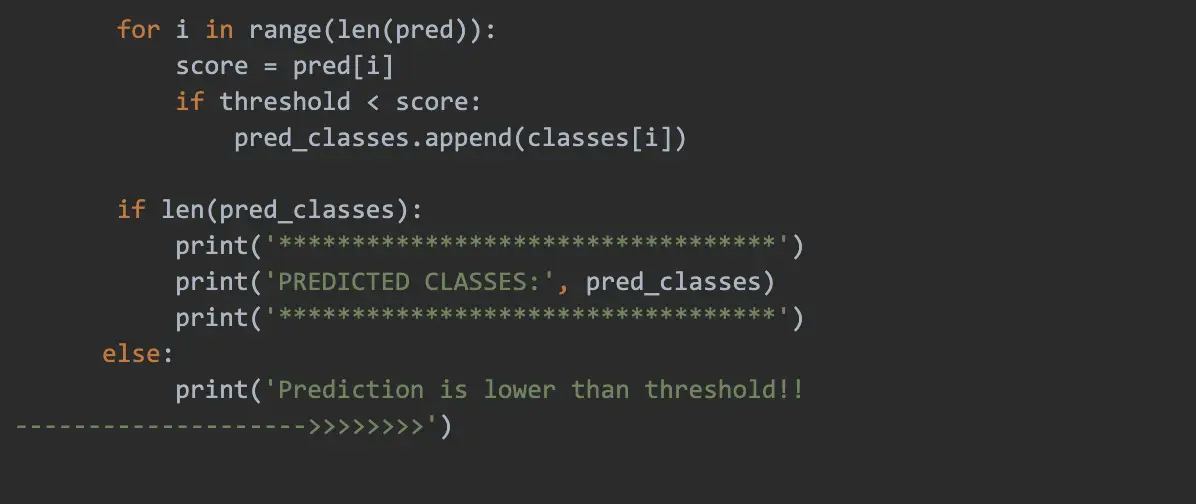
Preprocess and Training Code
This is a local Python code that we will run later in Colab:
Run a Training
Go back to Colab notebook and run the following command which will start python script in Colab environment on GPU:
%run "/content/drive/My Drive/bert-multilabel-text-classification/app.py"
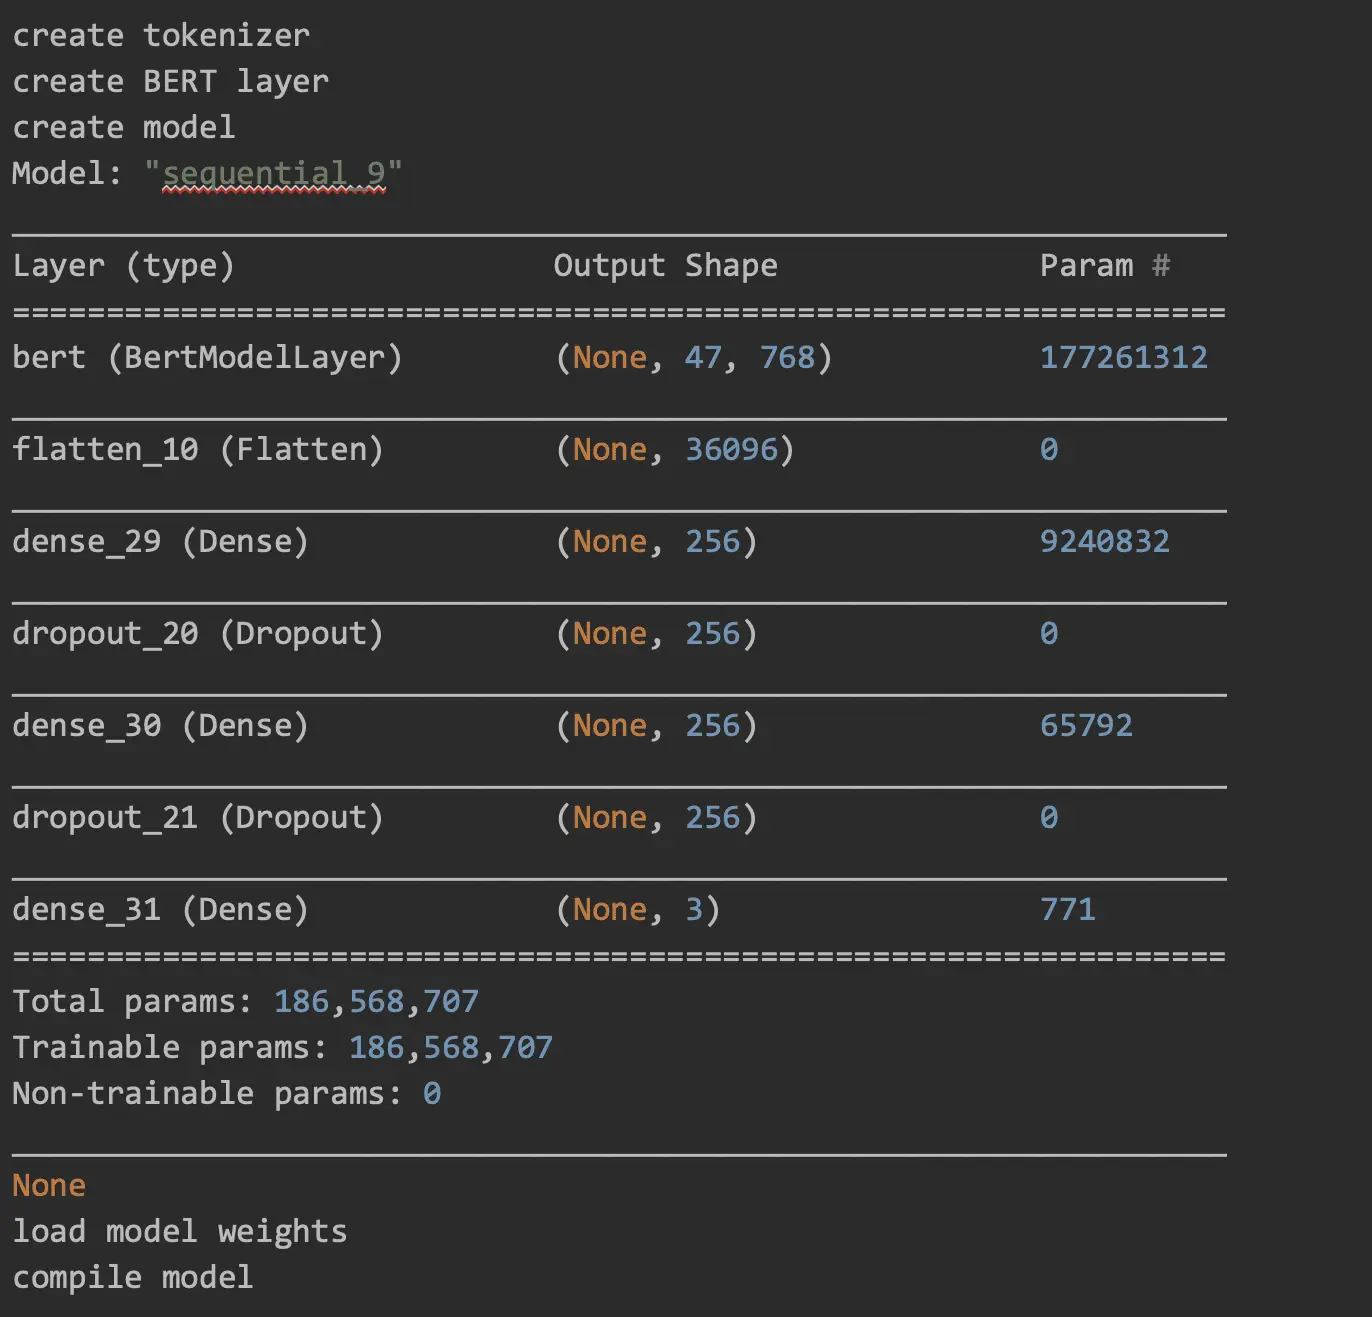
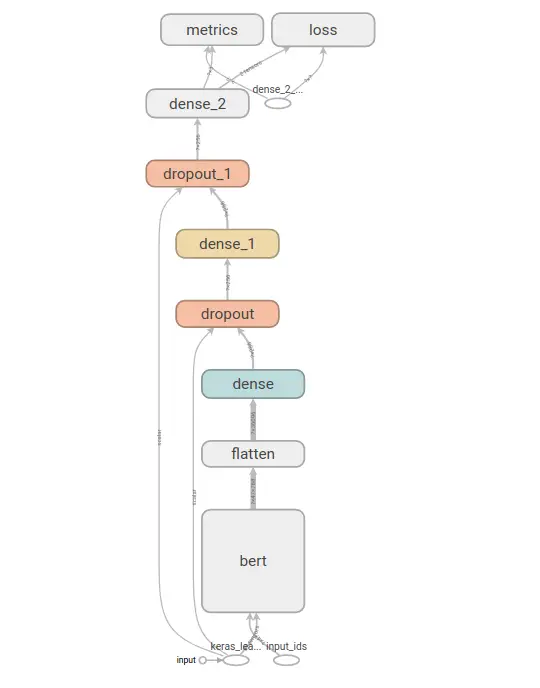
Our model graph:
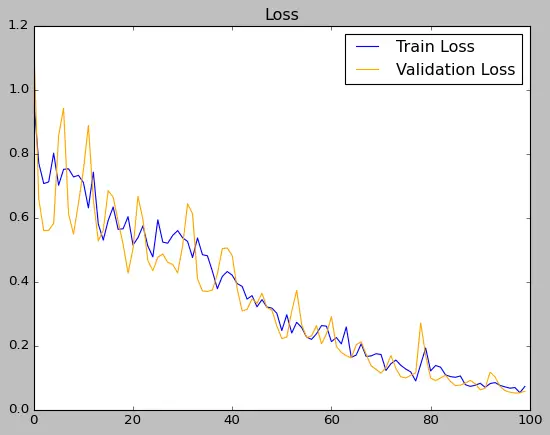
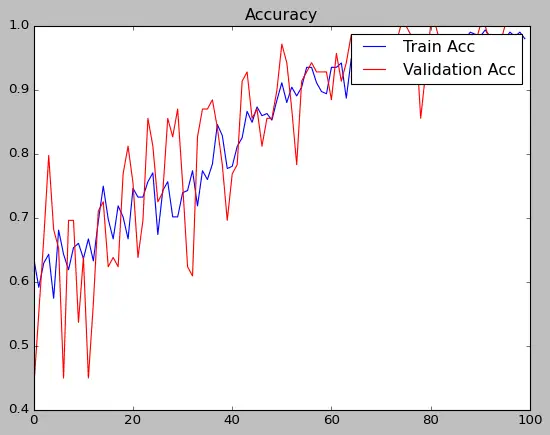
Watch Training Results
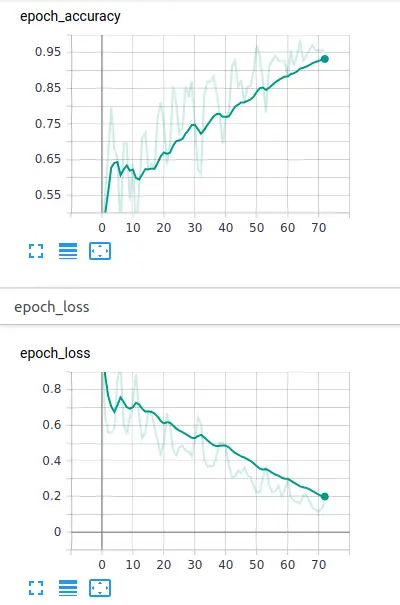
loss: 0.0723 - accuracy: 0.9794
Evaluate Model with Forms
Google Colab Notebook provides us with a simple form where we type our own phrases to evaluate the model. Before using forms, we initiate our predictor method:
%run "/content/drive/My Drive/bert-multilabel-text-classification/predictor.py"
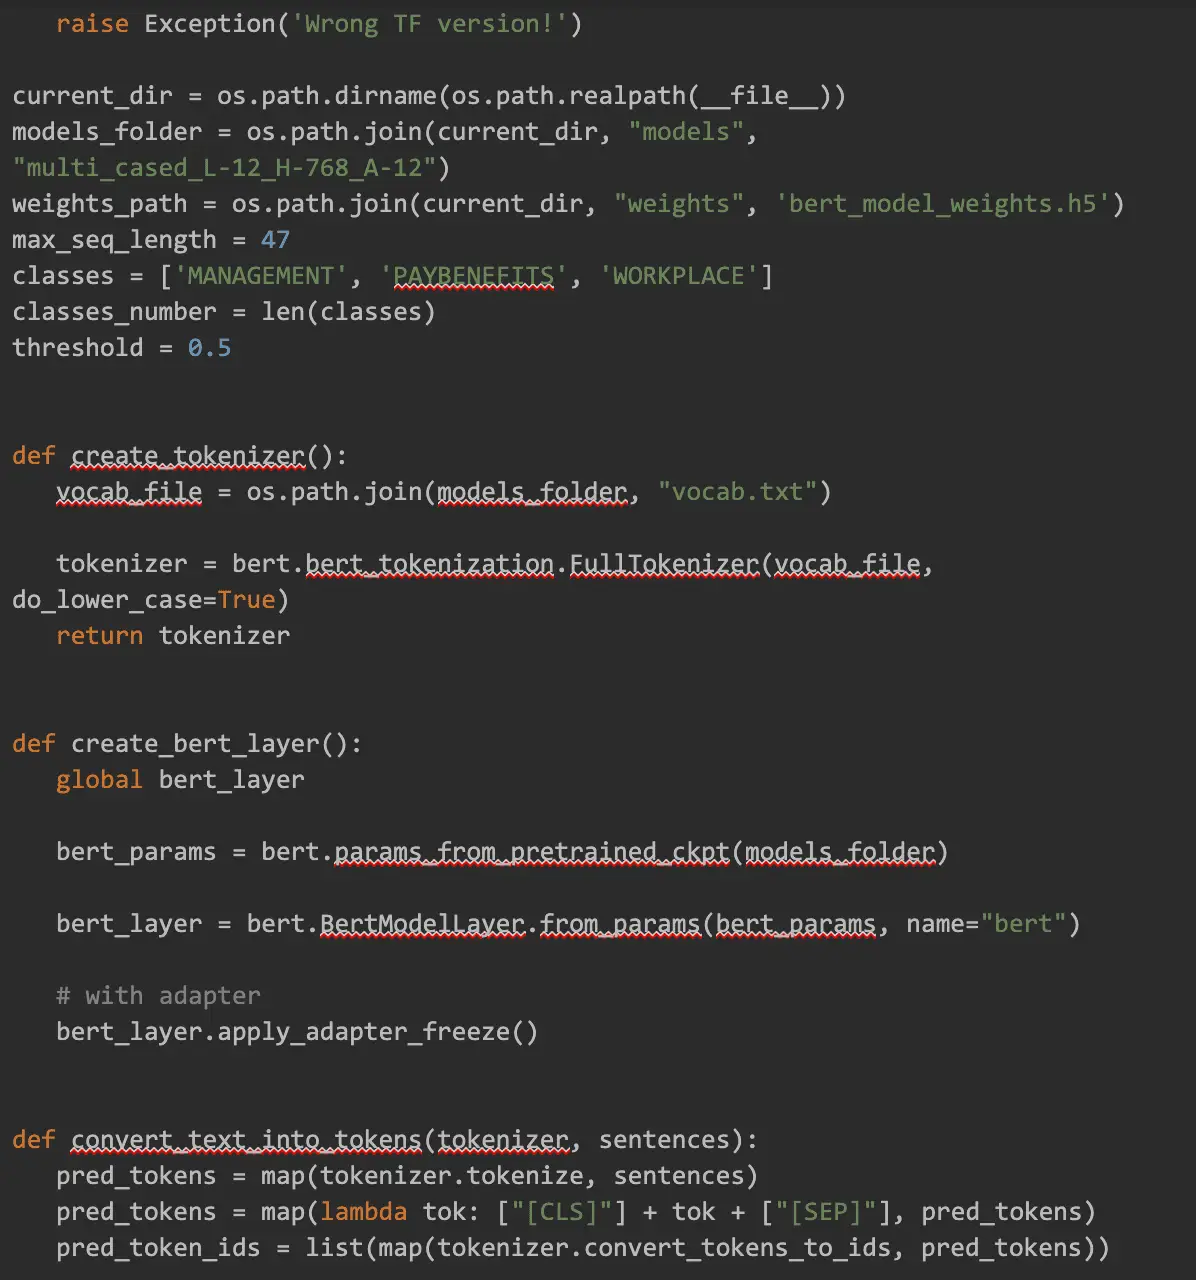
This will create tokenizer, make BERT Layer for the model, and load trained model weights.

Example Colab Code for the Form with Four Input Fields:
comment_1 = 'bets company ever' #@param {type:"string"}
comment_2 = 'hoffe, das Management wird das Anreizsystem nicht weiter \xE4ndern' #@param {type:"string"}
comment_3 = 'good management' #@param {type:"string"}
comment_4 = 'good management and best company ever' #@param {type:"string"}

Then we call model.predict using values from the form variables:
text_data = [comment_1, comment_2, comment_3, comment_4]
get_predictions(text_data)
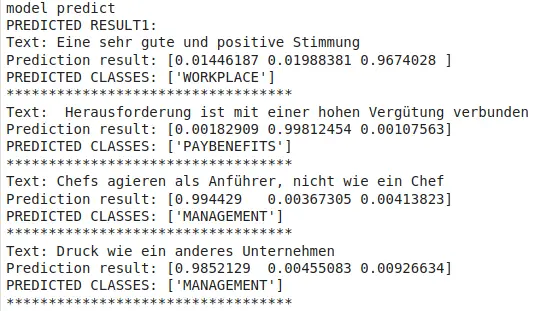
So, that’s it! To receive good results, you should also prepare a good dataset. With the help of examples, you train the model.
Our next experiment will be using BERT as a QA system (question/answer) which should be able to learn from a few pages of the text. Till then!
